We’re sure these guidelines will be of great help, if not, feel free to contact us.
The Basics
BRICKLAYING & PLASTERING
According to general building guidelines.
IMPORTANT: Mix only as much mortar or plaster as you can use in 2 hours. Should your mix stiffen slightly in this period, some water may be added to regain workability. After 2 hours the unused mortar or plaster should be discarded.
1. Remove any lumps, stones or foreign objects from the sand
2. Measure out the sand and place it in a long thin heap on a flat, clean, hard surface (or mix in a wheelbarrow if making a small batch)
3. Pour out cement on top of the sand
4. Mix cement and sand together until uniform in colour
5. Create a hollow in the centre and slowly add clean water while mixing. The mix is correct when it is like a thick paste, able to stand by itself without collapsing, yet wet enough to be spread easily with a trowel, like margarine
1. Bricks must be laid on a concrete slab or foundation
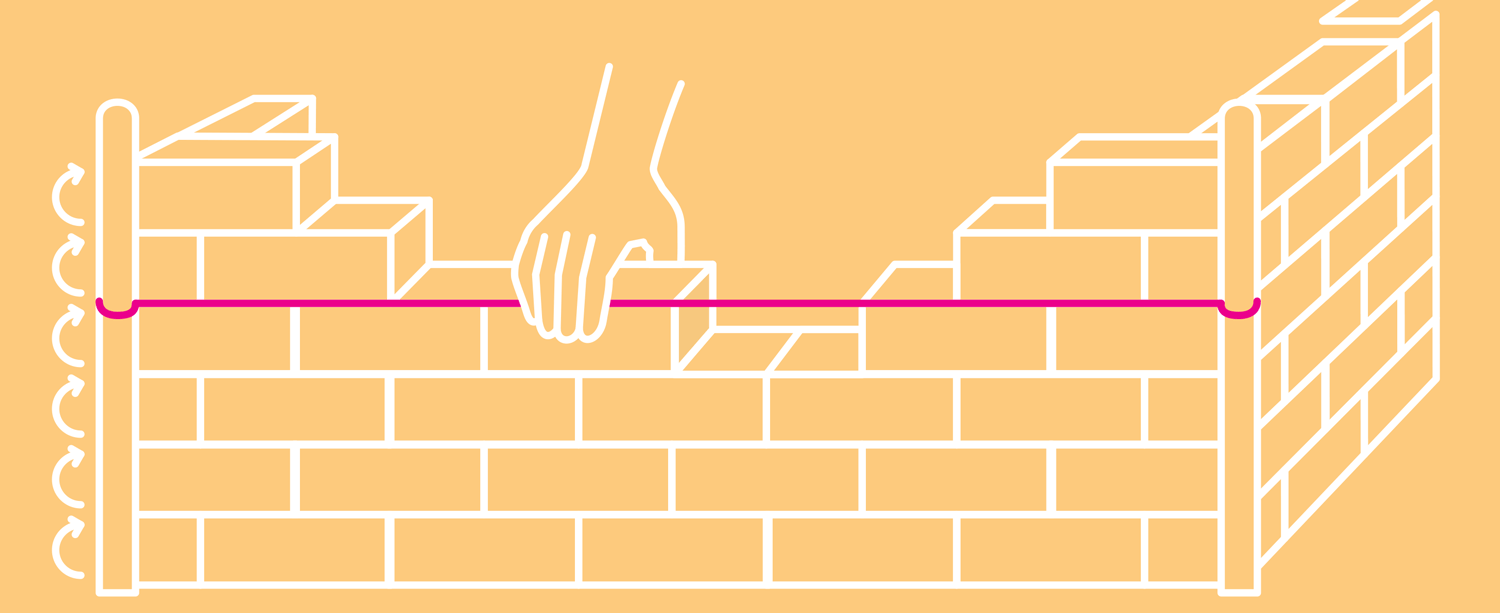
2. Start by building the corners. To lay the first course of bricks, use your trowel to spread mortar onto the concrete surface. Use a fishing line stretched tight between the corners to lay the first row of bricks. The back top edge of every brick laid must be exactly in line with the fishing line
3. Place enough mortar to lay 2-3 bricks at a time
4. Place a brick onto the fresh mortar and tap it into place until the top edge of the brick lines up exactly with the fishing line guide
5. ‘Butter’ each new brick by slapping mortar onto the end of the brick before placing it hard up against the preceding brick
6. Scrape away any excess mortar that has been squeezed out from between the bricks as you go before it dries and hardens. Ensure that you remove the mortar before it hardens
7. Use a spirit level to check that the row is level and to ensure that the corners are vertical (i.e. straight up and not leaning in or out)
8. Once the corners are built, simply move the fishing line up, row by row, and fill in the spaces between the corners. Because your bottom row is level and your corners are vertical, your whole wall will be level and vertical